Monitoring the Email Deliverability of Transactional Email
It's absolutely critical to maintain the reputation of the domain you use for sending emails. Of course, every email marketer knows this. Pretty sure they teach that on the first day of class.
Turns out that it's equally important for transactional emails generated by your web app. You'd think there'd be less to worry about but it's important to keep a very close watch. If your reputation drops and your provider suspends your account you could be in for a world of pain. No more emails being sent from your app probably means that the usability of the app is grinding to a halt and an angry mob of customers is forming outside your door.
The trick is to capture deliverability metrics so that you can monitor them and take action before a problem gets out of hand. In this post, we'll show you how to do just that, log and monitor AWS SES email delivery metrics.
What Impacts Transactional Email Deliverability?
There are a variety of scenarios that can cause your email list to become polluted. If that happens it can result in your platform sending emails to recipients who either can't receive your messages or don't want them. When that happens your domain's reputation can be hurt and as we discussed that could start that nasty avalanche where your email provider cuts you off and then you can't send any emails.
Here are some scenarios that can impact the deliverability of transactional emails:
Work emails
Users may sign up for your platform using their work emails. Whenever they leave their jobs, their email addresses may become invalid after a period of time when their employer decides to recycle them. If your app sends an email, well, +1 in the bounce category.
Spam
If your platform doesn't provide a clear and easy way for your users to manage their notification preferences, manage/cancel their accounts, or stop hearing from your platform, they'll do what makes sense to them. They'll hit that SPAM button. +1 for the complaint category.
Cancelled email subscriptions
Not all email addresses last forever, users might sign up to your platform using email addresses that they might have canceled later on. +1 for the bounce category.
Unverified email addresses
Users might sign up for your platform using the wrong email address. Could be a typo or some other data entry mistake. This results in a user having the wrong email address on your platform. +1 for the bounce category.
Removed aliases and distribution lists
Users may sign up for your platform without using a real email address. Perhaps it's an alias or an email distribution list. That address may end up being deleted or changed. +1 for the bounce category.
How Can We Monitor the Deliverability Metrics for Transactional Emails?
Many email services out there provide you with the needed tools to capture email delivery reports, including bounces and complaints, monitor them, and hook them up with your platform to take immediate action. Services like SendGrid and MailGun have some great tools built in and ready to use.
Unfortunately, those ready-to-use tools don't exist when your email provider is AWS Simple Email Service (SES). AWS SES is pretty much bare-bones in comparison to those all-in-one solutions.
The good news is that AWS has what you need to build up your own custom solution. It takes some work but we're going to show you how!
AWS SES Logging and Monitoring
In this article, we'll focus on a common and important part of the solution, which is saving email delivery reports in permanent storage. With this base in place, you'll be able to build a variety of solutions that fit your unique business needs e.g., data analysis, fine-grained alerting, and building integrations back to your app.
Out of the box, AWS SES provides three different delivery information types:
- Bounces
- Complaints
- Delivery
Though this information is available, it's fleeting. It's gone forever if you don't capture it. Our solution relies on pushing this information to AWS Simple Notification Service (SNS) topics. From SNS they're pushed to an AWS Simple Queue Service (SQS) queue. Once in the queue, an AWS Lambda function takes care of moving those feedback notifications to permanent storage, in our case we chose Amazon DynamoDB.
So to recap the delivery information is flowing from SES to SNS to SQS and then Lambda is pushing the data to DynamoDB. Phew! That's a lot of hopping around.
You may be asking yourself: "Why all of the things?" It sounds over complicated and must be overkill!
Trust us, we wish it was easier but this is the game you have to play when working with AWS SES. Don't worry though, while going through the steps of setting this all up we'll be right there with you.
Before we start, here's what you'll need:
To be able to complete this setup, we need to make sure we check all these prerequisites:
- The domain and at least one address that you will be using for this setup must be set up to receive messages at an email service provider (e.g., Gmail, Outlook, etc). You'll need access to the inbox of that address.
- The domain has a hosted zone in Route53 in the AWS account/region you're working on.
- The solution would still work if it was hosted somewhere else, but a few steps would be different based on that (unfortunately, that's not covered in this guide).
- The AWS user you're using to perform this setup has permission to access all the involved services: (IAM, SES, SNS, SQS, Lambda, CloudWatch, and DynamoDB).
- AWS CLI is set up with the proper credentials on the machine we're running the setup commands on. We're going to use AWS CLI commands to create and configure the different AWS resources. Of course, the CLI isn't the only option to perform these steps. As an alternative, you could use the web interface, Terraform, or AWS CDK to achieve the same outcome.
- The jq JSON processor library is installed for handling some AWS CLI output. Just makes it a bit easier.
- Familiarity with AWS and its CLI, Python, jq, and Bash.
Ready to rumble? Let's go!
Prepare Environment Variables
Let's set some environment variables that we'll be using down the road:
export EMAIL_DOMAIN=your.domain
export MAIN_EMAIL_IDENTITY=$EMAIL_DOMAIN@your.domain
export EMAIL_DELIVERY_QUEUE_NAME=email-delivery
export SES_DELIVERY_BASE_NAME=ses-delivery
Verify identities
In order to send emails using SES, you need to verify the FROM address you're using to send from and the domain ownership of that email address.
Verify the email identity
Running the following command will initiate the identity verification process for the email address. You'll receive a message with a verification link to that inbox, click on the link and it will be verified.
aws ses verify-email-identity --email-address $MAIN_EMAIL_IDENTITYVerify the domain
- Add the domain identity first:
aws ses verify-domain-identity --domain $EMAIL_DOMAIN- Get the DKIM records:
export DKIM_JSON=$(aws ses get-identity-dkim-attributes \
    --identities=$EMAIL_DOMAIN)

export DKIM_RECORD_1=$(echo $DKIM_JSON | jq -r '.DkimAttributes."'${EMAIL_DOMAIN}'".DkimTokens'[0])

export DKIM_RECORD_2=$(echo $DKIM_JSON | jq -r '.DkimAttributes."'${EMAIL_DOMAIN}'".DkimTokens'[1])

export DKIM_RECORD_3=$(echo $DKIM_JSON | jq -r '.DkimAttributes."'${EMAIL_DOMAIN}'".DkimTokens'[2])- Create the Route53 records:
ROUTE53_RECORDS=$(mktemp /tmp/route53_records.json.XXXXX)
    cat > $ROUTE53_RECORDS << EOF
    {
        "Comment": "Add a CNAME record for DKIM Verification",
        "Changes": [
            {
                "Action": "CREATE",
                "ResourceRecordSet": {
                    "Name": "$DKIM_RECORD_1._domainkey.$EMAIL_DOMAIN.",
                    "Type": "CNAME",
                    "TTL": 1800,
                    "ResourceRecords": [
                        {
                            "Value": "$DKIM_RECORD_1.dkim.amazonses.com"
                        }
                    ]
                }
            },
            {
                "Action": "CREATE",
                "ResourceRecordSet": {
                    "Name": "$DKIM_RECORD_2._domainkey.$EMAIL_DOMAIN.",
                    "Type": "CNAME",
                    "TTL": 1800,
                    "ResourceRecords": [
                        {
                            "Value": "$DKIM_RECORD_2.dkim.amazonses.com"
                        }
                    ]
                }
            },
            {
                "Action": "CREATE",
                "ResourceRecordSet": {
                    "Name": "$DKIM_RECORD_3._domainkey.$EMAIL_DOMAIN.",
                    "Type": "CNAME",
                    "TTL": 1800,
                    "ResourceRecords": [
                        {
                            "Value": "$DKIM_RECORD_3.dkim.amazonses.com"
                        }
                    ]
                }
            }
        ]
    }
    EOF
    export DOMAIN_RECORD_SET_ID=$(aws route53 list-hosted-zones-by-name \
        --dns-name $EMAIL_DOMAIN \
        --max-items 1 \
        --query=HostedZones[0].Id \
        --output text)
    aws route53 change-resource-record-sets \
        --hosted-zone-id $DOMAIN_RECORD_SET_ID \
        --change-batch file://$ROUTE53_RECORDS
Alternatively, use the AWS::SES web console to create the records with one button click.
If you're using a different domain service other than Route53 you'll need to create these records manually (or using the tools the other service suggests).
Checkpoint!
Now that we've verified our email-sending identities, let's test sending a message:
- Create
destination.jsonand fill it out with this JSON object below.
{
    "ToAddresses":  ["<verified_email@verified_domain>"],
    "CcAddresses":  [],
    "BccAddresses": []
}- Create
message.jsonand fill it out with the JSON object below
{
    "Subject": {
        "Data": "This is a test message",
        "Charset": "UTF-8"
    },
    "Body": {
        "Text": {
            "Data": "Test message subject.",
            "Charset": "UTF-8"
        },
        "Html": {
            "Data": "Test message body",
            "Charset": "UTF-8"
        }
    }
}- Send the message:
aws ses send-email \
    --destination file://destination.json \
    --message file://message.json
    --from $MAIN_EMAIL_IDENTITY
Note: Before moving forward, make sure the message has been successfully sent and delivered to the destination email inbox.
Set up SNS
Create SNS topics
AWS SNS is a fully managed Pub/Sub service for application-to-application (A2A) and application-to-person (A2P) messaging. In order to send the SES feedback notifications to another service, we need to create an SNS topic.
export SES_DELIVERY_SNS_TOPIC=$(aws sns create-topic \
    --name $EMAIL_DELIVERY_QUEUE_NAME \
    --output text \
    --query "TopicArn")
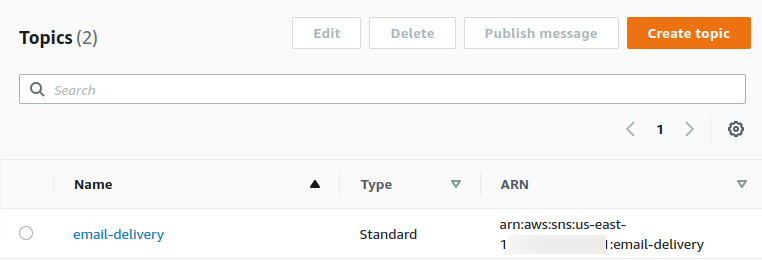
SNS topics list on the AWS Web Console
Set the notification topic
Now that we have an SNS topic, let's set the SNS topic for the different feedback notification types for the sending identity and enable notifications:
# Bounces
aws ses set-identity-notification-topic \
    --identity=$MAIN_EMAIL_IDENTITY \
    --notification-type=Bounce \
    --sns-topic=$SES_DELIVERY_SNS_TOPIC

aws ses set-identity-headers-in-notifications-enabled \
    --identity=$MAIN_EMAIL_IDENTITY \
    --notification-type=Bounce \
    --enabled

# Complaints
aws ses set-identity-notification-topic \
    --identity=$MAIN_EMAIL_IDENTITY \
    --notification-type=Complaint \
    --sns-topic=$SES_DELIVERY_SNS_TOPIC

aws ses set-identity-headers-in-notifications-enabled \
    --identity=$MAIN_EMAIL_IDENTITY \
    --notification-type=Complaint \
    --enabled

# Deliveries/Successes
aws ses set-identity-notification-topic \
    --identity=$MAIN_EMAIL_IDENTITY \
    --notification-type=Delivery \
    --sns-topic=$SES_DELIVERY_SNS_TOPIC

aws ses set-identity-headers-in-notifications-enabled
    --identity=$MAIN_EMAIL_IDENTITY \
    --notification-type=Delivery \
    --enabled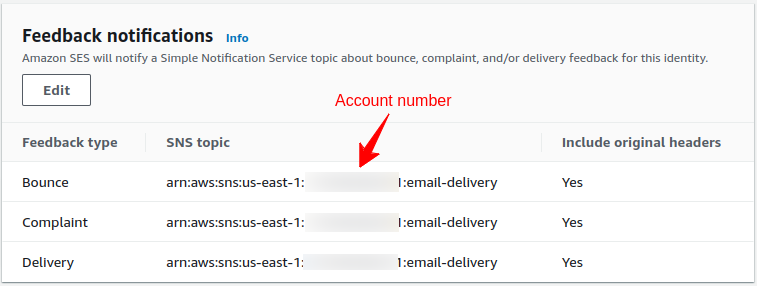
Feedback notifications section on the AWS Web Console
Set up SQS
By AWS's definition, SQS is a fully managed message queuing for microservices, distributed systems, and serverless applications.
You may ask "why do we need SQS?", we could just add a Lambda subscription to the SNS, or even maybe an external API subscription, and make things much simpler. Well right, we could do that, the downside of doing it this way is the risk of losing feedback notifications if anything goes wrong on the Lambda function side or the external API side. Those notifications would be lost forever!
By adding the SQS sauce to this, we're giving ourselves some buffer. If anything goes wrong, the feedback notifications will live in the SQS queue for 4 days (configurable) assuming they're not read and consumed by the next step of this pipe. That'll give us time to correct issues while not losing messages. Resiliency!
Create and export the SQS queue name
export EMAIL_DELIVERY_SQS_QUEUE=$(aws sqs create-queue \
    --queue-name $EMAIL_DELIVERY_QUEUE_NAME \
    --output text \
    --query QueueUrl)
Create and Set the DLQ (Dead Letter Queue)
This queue will host the messages that the Lambda function failed to process, or the Lambda event source mapping failed to read:
export EMAIL_DELIVERY_DLQ_NAME=$(aws sqs create-queue \
    --queue-name $EMAIL_DELIVERY_QUEUE_NAME-dlq \
    --output text)

export DLQ_ARN=$(aws sqs get-queue-attributes \
    --queue-url $EMAIL_DELIVERY_DLQ_NAME \
    --attribute-names QueueArn --output json \
    | jq -r '.Attributes.QueueArn')

aws sqs set-queue-attributes \
    --queue-url $EMAIL_DELIVERY_SQS_QUEUE \
    --attributes '{"RedrivePolicy": "{\"deadLetterTargetArn\":\"'${DLQ_ARN}'\",\"maxReceiveCount\":\"2\"}" }'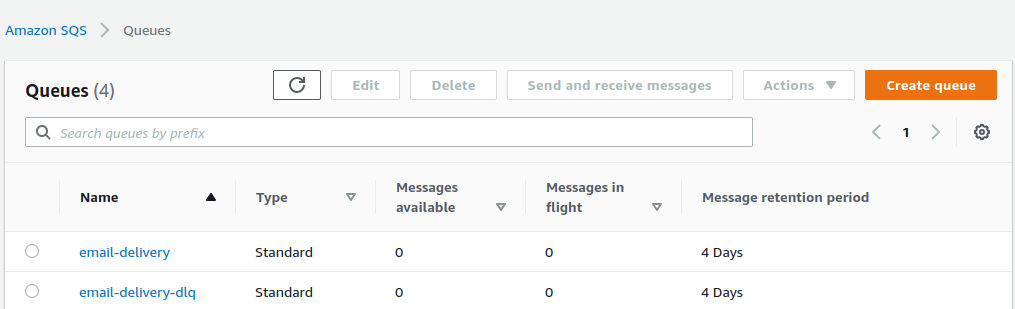
The created SQS Queues on the AWS Web Console
Subscribe the SQS to the SNS topic
Now we need to subscribe the SQS to the SNS topics. That'll let the SNS notifications flow to their safe place in the SQS queue:
export EMAIL_DELIVERY_QUEUE_ARN=$(aws sqs get-queue-attributes \
    --queue-url $EMAIL_DELIVERY_SQS_QUEUE \
    --attribute-names QueueArn \
    --output json | jq -r '.Attributes.QueueArn')

aws sns subscribe \
    --topic-arn=$SES_DELIVERY_SNS_TOPIC \
    --protocol=sqs \
    --notification-endpoint=$EMAIL_DELIVERY_QUEUE_ARN
Create an access policy file
export SQS_QUEUE_POLICY_JSON=$(mktemp /tmp/sqs_queue_policy.json.XXXXX)
cat > $SQS_QUEUE_POLICY_JSON << EOF
{
    "Version": "2012-10-17",
    "Statement": [{
        "Sid": "topic-subscription-$SES_DELIVERY_SNS_TOPIC",
        "Effect": "Allow",
        "Principal": {
            "AWS": "*"
        },
        "Action": "SQS:SendMessage",
        "Resource": "$EMAIL_DELIVERY_QUEUE_ARN",
        "Condition": {
            "ArnLike": {
                "aws:SourceArn": "$SES_DELIVERY_SNS_TOPIC"
            }
        }
    }]
}
EOF
Set the policy
aws sqs set-queue-attributes --queue-url $EMAIL_DELIVERY_SQS_QUEUE --policy file://$SQS_QUEUE_POLICY_JSONSet up DynamoDB
DynamoDB is a fast, flexible NoSQL database service for single-digit millisecond performance at any scale. The reasons it was chosen for this solution (in addition to how it is described by the AWS definition) are:
- The ease of setup and use.
- Being an AWS native service while we're solving an AWS-cloud-specific issue.
While we chose DynamoDB that doesn't mean you have to. The same goal could be achieved by choosing a different database system, both relational or NoSQL databases could work, but the steps will be different to set that up properly.
Create a DynamoDB table to store records written by the Lambda function
Be mindful that the table name is hard coded in the Lambda function's code.
aws dynamodb create-table \
    --table-name $SES_DELIVERY_BASE_NAME \
    --attribute-definitions AttributeName=messageId,AttributeType=S AttributeName=createdOn,AttributeType=S \
    --key-schema AttributeName=messageId,KeyType=HASH AttributeName=createdOn,KeyType=RANGE \
    --provisioned-throughput ReadCapacityUnits=5,WriteCapacityUnits=5

export DYNAMODB_TABLE_ARN=$(aws dynamodb describe-table \
    --table-name $SES_DELIVERY_BASE_NAME \
    --output json | jq -r '.Table.TableArn')
Set up Lambda
The Lambda function will need to interact with a few services and to do so it'll need to have appropriate permissions.
Create the IAM policy file
 LAMBDA_ROLE_JSON=$(mktemp /tmp/lambda_role.json.XXXXX)
    cat > $LAMBDA_ROLE_JSON << EOF
    {
        "Version": "2012-10-17",
        "Statement": [
            {
                "Effect": "Allow",
                "Action": [
                    "sqs:SendMessage",
                    "sqs:DeleteMessage",
                    "sqs:ChangeMessageVisibility",
                    "sqs:ReceiveMessage",
                    "sqs:TagQueue",
                    "sqs:UntagQueue",
                    "sqs:PurgeQueue",
                    "sqs:GetQueueAttributes"
                ],
                "Resource": "${EMAIL_DELIVERY_QUEUE_ARN}"
            },
            {
                "Effect": "Allow",
                "Action": [
                    "sqs:SendMessage",
                    "sqs:DeleteMessage",
                    "sqs:ChangeMessageVisibility",
                    "sqs:ReceiveMessage",
                    "sqs:TagQueue",
                    "sqs:UntagQueue",
                    "sqs:PurgeQueue",
                    "sqs:GetQueueAttributes"
                ],
                "Resource": "${DLQ_ARN}"
            },
            {
                "Effect": "Allow",
                "Action": [
                    "logs:CreateLogGroup",
                    "logs:CreateLogStream",
                    "logs:PutLogEvents",
                    "logs:DescribeLogStreams"
                ],
                "Resource": [
                    "arn:aws:logs:*:*:*"
                ]
            },
            {
                "Effect": "Allow",
                "Action": [
                    "dynamodb:PutItem"
                ],
                "Resource": [
                    "${DYNAMODB_TABLE_ARN}"
                ]
            }
        ]
    }
    EOF
Create an IAM role and attach the policy
export LAMBDA_ROLE_ARN=$(aws iam create-role \
    --role-name $SES_DELIVERY_BASE_NAME-lambda-role \
    --assume-role-policy-document '{"Version": "2012-10-17","Statement": [{"Effect": "Allow", "Principal": {"Service": "lambda.amazonaws.com"}, "Action": "sts:AssumeRole"}]}'| jq -r '.Role.Arn')

aws iam put-role-policy \
    --role-name $SES_DELIVERY_BASE_NAME-lambda-role \
    --policy-name other-services-access \
    --policy-document file://$LAMBDA_ROLE_JSON
Create and upload the Lambda function
AWS Lambda is a serverless, event-driven compute service that lets you run code for virtually any type of application or backend service without provisioning or managing servers. You can trigger Lambda from over 200 AWS services and software-as-a-service (SaaS) applications and only pay for what you use.
How is this going to fit into this solution?
It may sound mysterious, but let's create the function first, and then we'll see how it fits.
Let's create the function file lambda_function.py in a directory ses-delivery-to-dynamodb-lambda
Why Python though?
Lambda gives you the ability to write your function in many languages (C#, Go, Java, Javascript, and Ruby) including Python, and provides you with the needed frameworks to run those languages.
We chose Python because of our familiarity with it and to maintain consistency with the rest of our codebase. If Python isn't for you, no worries, the function itself is quite simple, has only two dependencies, and can be written in any of the supported languages and frameworks.
Fill the lambda_function.py file with the following Python code:
import boto3
import json

def lambda_handler(event, context):
    """Read batches of SQS messages and write them to DynamoDB"""
    batch_failure_response = {}
    messages_to_reprocess = []

    client = boto3.resource('dynamodb')
    table = client.Table('ses-delivery')

    for record in event['Records']:
        try:
            payload = json.loads(record['body'])
            item = {
                'messageId': payload['MessageId'],
                'createdOn':  payload['Timestamp'],
                'deliveryMessage': json.loads(payload['Message']),
            }
            table.put_item(Item=item)
        except Exception as e:
            messages_to_reprocess.append({'itemIdentifier': record['messageId']})

    batch_failure_response['batchItemFailures'] = messages_to_reprocess
    return batch_failure_response
As described in the Docstring of the function, it'll read SQS messages from the main SQS queue in the form of batches and write them to the DynamoDB table. In case of failure, it'll return a list of the failed message IDs to be written by Lambda to the DLQ for investigation.
- Zip the lambda deployment package which in our case is only one Python file. If you wanted to make this function write to some external services, or use a different type of database, you might need to include additional dependencies. In that case, you'd have a bit more work to bundle the deployment package:
zip ./$SES_DELIVERY_BASE_NAME-to-dynamodb-lambda/lambda_deployment_package.zip \
    ./$SES_DELIVERY_BASE_NAME-to-dynamodb-lambda/lambda_function.py
Create and upload the function code in one command:
We're using fileb to load a binary file, for more info read here
aws lambda create-function \
    --function-name=$SES_DELIVERY_BASE_NAME-to-dynamodb \
    --role=${LAMBDA_ROLE_ARN} \
    --runtime='python3.9' \
    --zip-file fileb://$SES_DELIVERY_BASE_NAME-to-dynamodb-lambda/lambda_deployment_package.zip \
    --handler='lambda_function.lambda_handler'
Update and deploy the Lambda function
To update and deploy the Lambda function, do your changes locally, then run the following commands. (be careful since this deploys the function automatically):
zip ./$SES_DELIVERY_BASE_NAME-to-dynamodb-lambda/lambda_deployment_package.zip \
    ./$SES_DELIVERY_BASE_NAME-to-dynamodb-lambda/lambda_function.py

aws lambda update-function-code \
    --function-name=$SES_DELIVERY_BASE_NAME-to-dynamodb \
    --zip-file fileb://$SES_DELIVERY_BASE_NAME-to-dynamodb-lambda/lambda_deployment_package.zip
For experimenting with the solution, you might find editing and deploying the Lambda function's code in the AWS web console a little quicker and easier.
Link the Lambda function to the SQS queue as a source mapping
- Enable asynchronous invocation of the Lambda function by linking it to an event source:
export EVENT_SOURCE_MAPPING_UUID=$(aws lambda create-event-source-mapping \
    --function-name $SES_DELIVERY_BASE_NAME-to-dynamodb \
    --batch-size 200 \
    --maximum-batching-window-in-seconds 30 \
    --function-response-types ReportBatchItemFailures \
    --event-source-arn=$EMAIL_DELIVERY_QUEUE_ARN \
    | jq -r '.UUID')
- Update the Lambda function configurations to set a DLQ:
aws lambda update-function-configuration \
    --function-name $SES_DELIVERY_BASE_NAME-to-dynamodb \
    --dead-letter-config TargetArn=$DLQ_ARN
Done, bam!
Wait, what? That's right. The rumbling is over, now you're ready to rock!
Test the solution
To see this solution in action let's send some emails and watch the results pour into DynamoDB.
Now we don't really want to test bounces and complaints on our real domain as this would negatively affect its reputation. Remember the whole point is to monitor email deliverability and keep our domain reputation pristine.
The good news is that AWS provides a mailbox simulator solution, with different destination addresses for different behaviors, including:
Read more about their expected behavior.
- You can use the same method you used in the previous steps to test sending a message to one of these mailbox simulator addresses.
-
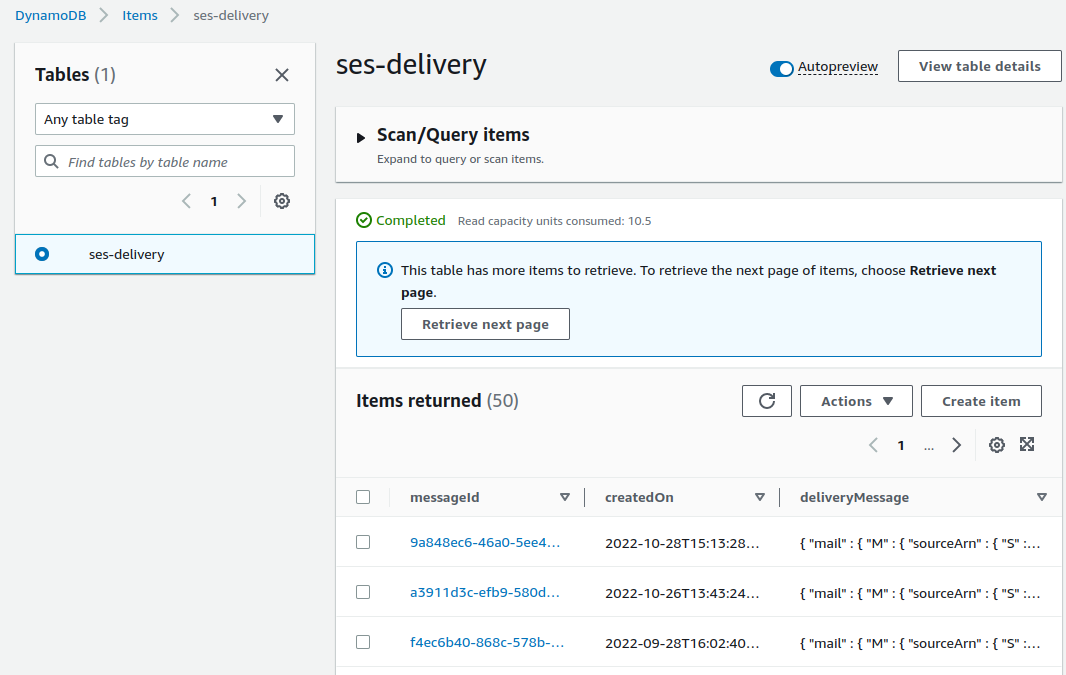
Once you've done that you can query DynamoDB for results. You can use the following command to scan the entire table for results, it will be empty until messages start to flow to the table:
aws dynamodb scan --table-name ses-delivery
After that, you'll want to narrow down the results by using different DynamoDB CLI commands like execute-statement or query, like:
aws dynamodb query \
  --table-name ses-delivery \
  --key-conditions '{
      "messageId": {
        "ComparisonOperator": "EQ",
        "AttributeValueList": [{"S": ""}]
      }
    }'
- A sample DynamoDB entry would look like this:
{
    "messageId": {
        "S": "f4ec6b40-868c-578b-8a0b-30eef4ec36ab"
    },
    "createdOn": {
        "S": "2022-09-28T16:02:40.613Z"
    },
    "deliveryMessage": {
        "M": {
        "delivery": {
            "M": {
            "processingTimeMillis": {
                "N": "1298"
            },
            "recipients": {
                "L": [
                {
                    "S": "success@simulator.amazonses.com"
                }
                ]
            },
            "remoteMtaIp": {
                "S": "104.47.75.228"
            },
            "reportingMTA": {
                "S": "a48-131.smtp-out.amazonses.com"
            },
            "smtpResponse": {
                "S": "250 2.6.0 <0100018384d5f9e9-ac091646-e81e-42bb-a0fb-ad3d256622c4-000000@email.amazonses.com> [InternalId=648540064800, Hostname=YT3PR01MB6566.CANPRD01.PROD.OUTLOOK.COM] 46177 bytes in 0.019, 2289.909 KB/sec Queued mail for delivery"
            },
            "timestamp": {
                "S": "2022-09-28T16:02:40.507Z"
            }
            }
        },
        "mail": {
            "M": {
            "messageId": {
                "S": "0100018384d5f9e9-ac091646-e81e-42bb-a0fb-ad3d256622c4-000000"
            },
            "callerIdentity": {
                "S": "ses-smtp-user.20220926-164421"
            },
            "commonHeaders": {
                "M": {
                "messageId": {
                    "S": "<166438095885.1507426.1156439282876093190@0e77d0af758c>"
                },
                "date": {
                    "S": "Wed, 28 Sep 2022 16:02:38 -0000"
                },
                "from": {
                    "L": [
                    {
                        "S": "From Name <your.email@your.domain>"
                    }
                    ]
                },
                "subject": {
                    "S": "Test Message Subject."
                },
                "to": {
                    "L": [
                    {
                        "S": "success@simulator.amazonses.com"
                    }
                    ]
                }
                }
            },
            "destination": {
                "L": [
                {
                    "S": "success@simulator.amazonses.com"
                }
                ]
            },
            "headers": {
                "L": [
                {
                    "M": {
                    "name": {
                        "S": "Content-Type"
                    },
                    "value": {
                        "S": "multipart/alternative; boundary=\"===============1705172274728391693==\""
                    }
                    }
                },
                {
                    "M": {
                    "name": {
                        "S": "MIME-Version"
                    },
                    "value": {
                        "S": "1.0"
                    }
                    }
                },
                {
                    "M": {
                    "name": {
                        "S": "Subject"
                    },
                    "value": {
                        "S": "Test Message Subject"
                    }
                    }
                },
                {
                    "M": {
                    "name": {
                        "S": "From"
                    },
                    "value": {
                        "S": "\"From Name\" <your.email@your.domain>"
                    }
                    }
                },
                {
                    "M": {
                    "name": {
                        "S": "To"
                    },
                    "value": {
                        "S": "success@simulator.amazonses.com"
                    }
                    }
                },
                {
                    "M": {
                    "name": {
                        "S": "Date"
                    },
                    "value": {
                        "S": "Wed, 28 Sep 2022 16:02:38 -0000"
                    }
                    }
                },
                {
                    "M": {
                    "name": {
                        "S": "Message-ID"
                    },
                    "value": {
                        "S": "<166438095885.1507426.1156439282876093190@0e77d0af758c>"
                    }
                    }
                },
                {
                    "M": {
                    "name": {
                        "S": "X-CUSTOM-HEADER-SES-TYPE"
                    },
                    "value": {
                        "S": "bucket_member_invite"
                    }
                    }
                },
                {
                    "M": {
                    "name": {
                        "S": "X-CUSTOM-HEADER-ID"
                    },
                    "value": {
                        "S": "10d27746-8088-4d33-9167-413e5a65108a"
                    }
                    }
                }
                ]
            },
            "headersTruncated": {
                "BOOL": false
            },
            "sendingAccountId": {
                "S": "131549455201"
            },
            "source": {
                "S": "\"From Name\" <your.email@your.domain>"
            },
            "sourceArn": {
                "S": "arn:aws:ses:us-east-1:131549455201:identity/your.email@your.domaino"
            },
            "sourceIp": {
                "S": "99.250.193.118"
            },
            "timestamp": {
                "S": "2022-09-28T16:02:39.209Z"
            }
            }
        },
        "notificationType": {
            "S": "Delivery"
        }
        }
    }
}
</your.email@your.domain></your.email@your.domain></your.email@your.domain>
- You may also want to test the DLQ behavior, in order to do so, just modify the Lambda function to make it return some entries in the
batch_failure_responsedictionary, and watch for entries in the DLQ.

What's next?
Wow! You made it. Thanks for reading.
Logging and monitoring email deliverability is critical to maintaining a happy and healthy transactional email system. AWS SES has all of the tools to do it but there's no easy button. We hope this guide gives you some ideas and saves you some time on your journey to taming your SES.
As with all solutions, there's always room to grow and adjust. Here are a few areas you might consider:
-
DynamoDB as a destination for these reports might not be for you. No worries. As mentioned above, you can consider any other choice that fits your business requirements and tech stack.
-
The Lambda function reads from the main SQS queue in the form of batches. In this exercise, we configured the
batch-sizeto be200and themaximum-batching-window-in-secondsto be30seconds. In your production environment, these values may not be optimal, so consider tweaking those based on your email-sending volume. -
This solution guarantees that the feedback notifications are saved in permanent storage but doesn't discuss what you should be doing with them. There's a world of possibilities. Writing an integration back to your app to pause email sending to a user that's complained is one idea.
No doubt, there's a lot to learn about domain reputation, email regulations, and other areas as you build your transactional email system. But the first step, once you're sending, is to see how those messages are being received. Guarding your email and domain reputation is critical to building a performant transactional email service.